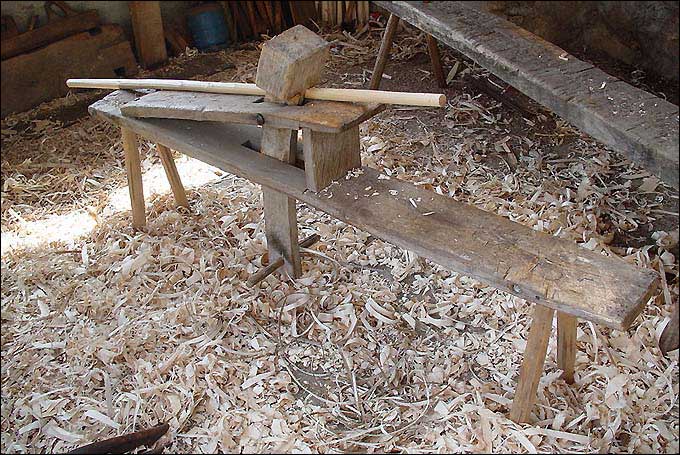
French shaving horse of Continental design taken by Ruizo.
There are two traditional styles of shaving horses, the English bodgeris bench and the Continental schnitzelbank or dumbhead. There is pictorial evidence of the dumbhead being used in the 15th and 16th centuries, although the English style does not show up until the late 19th century.
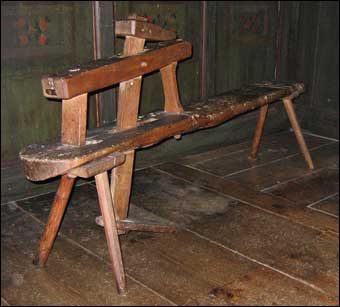
Black Forest or German or Swiss shaving horse taken by Flominator. It gives a longer lever-ratio which traps the workpiece more securely
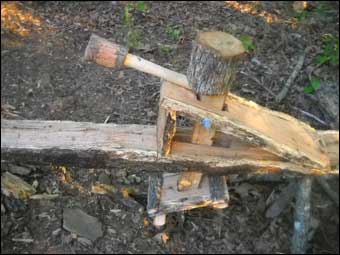
A sample of what is possible in primitive design if you have the logs available

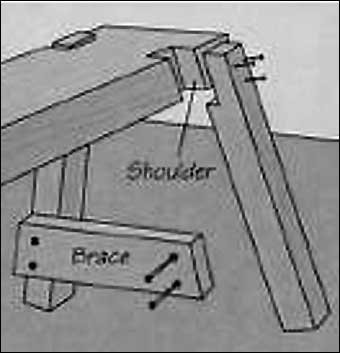
Attaching the legs and braces to the bench.
- Cut the 2 back legs and 2 front legs 2 X 4 X 19 1/2". If you want a slight incline, make the 2 front legs 1-2" shorter than the back legs. The legs will be cut at a 35 degree angle to make the bench trim-outs.
- Cut the bench 3 X 10 X 72".
- Take your saw and chisel and notch the bench to accept the four legs. You will be using a T half-lap joint to join the legs to the bench. It is easy to transfer angles with a T-Bevel
- Attach the legs to the bench with glue and screws.
- Cut 2 braces 1 1/2 X 3 1/2 X 13" for the front and back legs. Place the braces on the legs to get the proper angle.
- Attach the braces to the legs with glue and screws.
- Cut the bridge 2 X 10 X 35"
- Cut the riser 2 X 8 X 10". Use your T-Bevel and bevel the riser at a 15 degree angle.
- Place the riser approximately 30 inches from the back of the bench and glue and screw it into place underneath the bench.
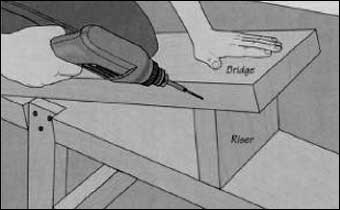
Attaching the bridge to the riser.
- Glue and screw the bridge to the riser.
- Glue and screw the front of the bridge to the bench.
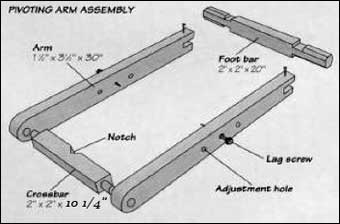
Pivoting Arm Assembly
- Cut the 2 arms of the pivoting arm assembly 1 1/2 X 3 1/2 X 30". The foot bar will be joined to the arms using a bridle joint while the crossbar will be joined using a mortise and tenon joint. Make a set of 3 countersunk holes on each arm to accept lag screws. One set of holes will be used. The other 2 sets are in case you want to adjust the pivoting arm assembly for thicker stock. Cut 1 mortise joint on each arm to accept the cross bar.
- Cut the crossbar of the pivoting arm assembly 2 X 2 X 10 1/4". Place a V-notch in the bottom center of the crossbar to hold the stock. Cut round tenons on both ends.
- Cut the foot bar of the pivoting arm assembly 2 X 2 X 20". You can make the foot bar an octagonal shape on each side of the arm assembly. Cut dadoes in the foot bar to match the notches in the arms.
- Once you attach the foot bar to the arms, the pivoting arm assembly can now placed over the shaving horse. The lag screws should be screwed loosely into place. Do not glue any part of the pivoting arm assembly.
- Slip the cross bar into place and do not use glue or screws.
- Finish tightening the lag screws.
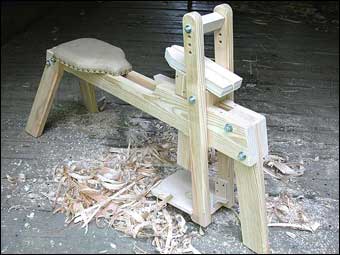
Source: Research & text by Bryan Wright


