Whatever the size you choose for your flooring, all pine wood should be kiln dried to minimize shrinkage. Greater widths magnify the problems of cracks between the floor boards. A twelve 12 inch wide pine board will shrink about an inch from the time it is harvested to the time when it is dried. Due to atmospheric conditions, boards will still expand and contract to a certain degree. If you are drying the boards, make sure the boards are properly stacked with slats between them for air circulation.
The flooring process now begins with preparation of the subfloor by setting any protruding nail heads, planing off any uneven joints, and giving it a thorough cleaning. Walk around the room to locate any squeaks. Since the cause of most squeaks is a loose subfloor rubbing up and down against nails, drive drywall screws into the joists below to tighten up the subfloor.
With the plywood subfloor down it is time to lay the boards. Cover the subfloor with a layer of fifteen pound asphalt felt overlapping the seams by three inches. This will help smooth out irregularities and will prevent creaking when walking on the floor.
Four methods of joining board edges. Top: bevelled ship-lap. Center: tongue and groove. Bottom: splint joint. Most wide board floors were simply butted without the use of any of these more complicated techniques
There are several techniques of joining the boards. The most popular joining technique method of connecting each board with the tongue and groove method. Another method is to butt against each other. If for any reason part of the floor would need to be pulled up, this method would require little effort to remove any boards. Another method would be to use a ship lap method with the joints cut out of the board allowing pieces to fit together with no overlapping. Another method would be a splint joint method which would be costly and time consuming. Tongue and groove joints are much stronger than a simple butt joint.
Floorboards run parallel with the hallway in this house built in 1811
In starting to lay the boards, the direction of the boards should be decided according to the shape of the room. Normally the pine boards are installed parallel to the length of room, but most importantly the boards should always run parallel to the hallway boards. In a center chimney cape, you often find that the winter kitchen is a long, narrow room, which will look like a passageway if the boards are laid the long way. To counteract this, boards should be laid across the narrow width. Keep traffic patterns in mind. It is better for boards to run across a doorway than at a right angle to it.
Measure the room's width at two more more points to establish an accurate centerline, and snap a chalk line parallel to your starting wall. The chalk line for the first board must be accurate to make sure the first row is straight. If the room is out of square, position the tongue of the first row parallel to the centerline and rip the groove side at an angle to the wall. Rip the first row to width using your circular or miter saw. It is important to leave a quarter inch gap at the wall for wood expansion. If you are running the boards perpendicular to the floor joists, cut the board ends so butt joints occur over floor joists.
Be sure to stagger butt joints from row to row so they don’t line up across the floor. End joints of two adjacent rows should not be closer than six inches. Cut the boards to length with a circular or miter saw.
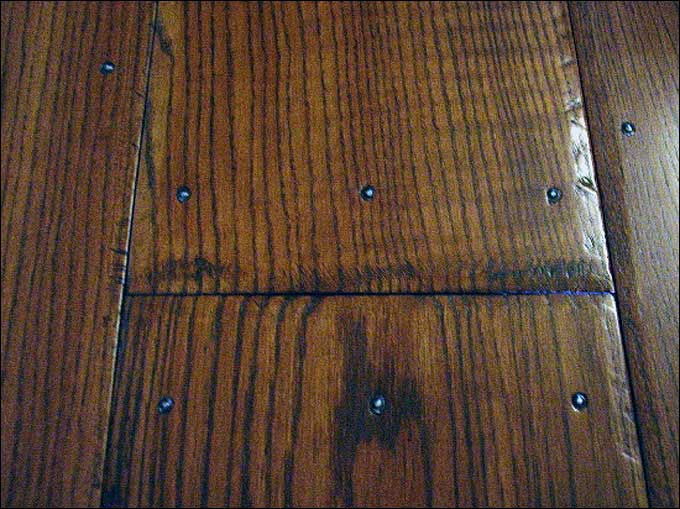
Rosehead cut nails from Tremont Nail Company, Mansfield Massachusetts. These have a twist on them that helps to keep them from pulling up from the floor. After 17 years when the floor was laid, not one has worked its way out of the floor.
The rosehead nails installed.
There are two methods to nailing the boards to the subflooring. You can use a flooring nailer which will hide the nail head or, in order to get that colonial look, you can use face nail them with rosehead nails from a nail manufacturer. If you choose to face nail them, be sure to keep the nails at least one inch away from the ends of the boards to prevent splitting. It is important that you predrill each hole prior to nailing. The nails should be 1 1/2 inches and preferably two inches long to grip into the subflooring.
A flooring nailer slips into the board's tongue and helps to grip each board tightly together. If you are face nailing, you can wedge the floorboards together using a 2 X 4 cut to the appropriate length and wedges.
Floorboards wedged for tight joints with 2 X 4 cut to approximate length. Wedges are placed at the end of the 2 X 4. Pine scraps are placed against the wall to protect the base and floorboards. Notice that the finished floorboards run parallel with length of the room. Remember to place felt under the pine board before laying.
Mark and then cut the board to fit at the door jamb. Cut the notch so that it slides about 1/2 inch under the jamb. The jamb will appear to be completely sitting on the flooring. Undercutting a jamb where the wood meets another flooring material can be tricky. Use a handsaw and a sharp chisel to finish the cut before the last floorboard is installed.
When you reach a final row, use a block and a pry bar to wedge the last boards into position. You’ll feel a lot of satisfaction when your notched and slotted board slides snugly into place.
If you are looking for that well aged look with your new pine flooring, don't be afraid to drop tools, drag ladders or lumber across the floor, take chains and drop them on the floor. Your are attempting to produce in a relatively short time the natural wear and tear of a couple of hundred years. Be careful not to go overboard with the process.
Painted floor boards in a house built in 1767. Notice the different directions in which the floor is laid.
You can either stain or paint the floor to give it that old time colonial look. Many of the New England homes and Pennsylvania farms used a dark stain. Colonists did not have the means to always afford rugs. Therefore, these floor were painted or stenciled with patterns to simulate a rug. Check back for future articles; Colonial Sense will give you techniques on painting your flooring to give it that well aged colonial look.

 Overview